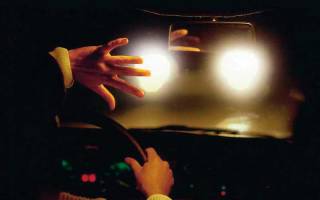
How should low beam headlights shine correctly?
How to adjust the headlights on a car with your own hands?
The task of headlights is to sufficiently illuminate the roadway in front of the car without dazzling drivers of oncoming vehicles and covering a narrow strip of the right shoulder. The first adjustment of the optics is made at the factory, then the position of the lighting devices is adjusted by the owner of the car as necessary. It is not necessary to make a special visit to a service station - do this work yourself, having first studied the instructions on how to adjust the headlights yourself.
When is tuning necessary?
The quality of roads in the countries of the former USSR, especially in the periphery, leaves much to be desired. Long-term operation of the vehicle in such conditions leads to a violation of the factory settings of the external lighting elements. Gradually, the settings get lost, causing the head optics to direct beams of light in different directions - up or directly under the wheels of the car.
Consequences of incorrect headlight adjustment:
- the driver has to strain to see the unlit part of the road surface;
- if the reflectors of the optics are raised at a large angle, passengers of oncoming cars suffer from glare;
- insufficient illumination of the roadside can lead to an accident - the driver will not notice an obstacle or a person walking along the edge of the road in time.
Note. Electrically adjusting the lighting devices does not help the situation, since the servos only change the angle of the optics up and down, and both headlights at the same time. The task of such systems is to adjust the direction of light beams depending on the vehicle load.
When you need to adjust your headlights yourself:
- if you notice multidirectional light streams (for example, the left headlight shines down, the right one shines up);
- drivers of oncoming cars constantly signal about blinding by briefly turning on the high beams;
- after repair, replacement or removal of front optics units;
- after being hit by the front of a car as a result of an accident;
- when installing rims or tires of other sizes;
- after replacing the front “sagging” springs;
- during the installation of fog lights (FTL).
If you happen to change burnt out light bulbs, then you do not need to adjust the position of the light fixtures. Another thing is the installation of new types of elements (xenon, LED) instead of standard halogen bulbs. In this case, it is advisable to adjust the low beam headlights.
Preparing to make adjustments
To achieve the correct position of the headlights, the adjustment procedure must be performed under certain conditions. Carry out the following preparatory work:
- Find a flat area without a slope adjacent to a vertical wall. One of the suitable options is a concreted entrance to the garage; the role of the setting template will be played by the gate.
- Remove unnecessary items from the trunk and interior of the car, leaving only the factory tool kit, first aid kit and spare tire. The goal is to ensure the curb weight of the vehicle specified in the operating instructions.
- Check the pressure in all tires and adjust them to normal if necessary.
- Clean the optical glass from dust and other contaminants that block the path of light flow. Do not use solvents, only ethyl alcohol-based glass cleaners.
- It is advisable to fill the fuel tank full, fill the washer tanks to the top and, if necessary, add antifreeze to the expansion tank.
A headlight adjustment diagram is drawn on the garage door or wall adjacent to the site. You will need a tape measure, a long straight bar and a marker. The color depends on the chosen background - for a white wall it is better to take a black felt-tip pen, for a dark gate - chalk. The diagram is drawn as follows:
- Drive the machine close to the wall. Using body parts or the car brand emblem as a guide, mark a point on the surface that coincides with the central (longitudinal) axis of the vehicle.
- Measure 7 m from the gate and drive the car to the specified distance. Draw a vertical line through the marked point.
- Take 4 measurements on the car: from both headlight bulbs to the ground and to the center of the car. On models equipped with separate high and low beam optics, the listed measurements are made for all four bulbs separately.
- Subtract 50 mm from the number indicating the distance to the ground. Set this size aside on the wall and draw a horizontal line.
- From the vertical axis, plot the distances to the centers of the lamps along the drawn line. Place marks in the form of segments. The scheme is ready.
Note. For separate optics, you need to draw 2 horizontal lines, and the second one must clearly correspond to the measurement from the high beam bulbs to the ground. Segments corresponding to the location of the outer lamps are laid out on it.
Before adjusting the position of the optics, it is also recommended to treat the adjustment screws with a penetrating aerosol lubricant such as WD-40, since the connection threads could become soured due to extremely rare rotation. As a rule, the adjusting screws are located on the rear plane of the headlight housing, facing into the engine compartment. The shape of the head is for a Phillips screwdriver, hexagon or special key.
Setup Guidelines
The procedure for adjusting light fluxes must be performed in the dark. Accordingly, it is advisable to prepare the setting template on the wall before dark. To adjust the headlights yourself, follow these simple instructions:
- Open the hood and turn on the low beam. If you want to save battery life, start the engine and leave it idling.
- Cover one “eye” of the car with a shield. On the second, rotate the vertical adjustment screw until the upper edge of the light beam aligns with the horizontal line.
- Adjust the optics in the horizontal plane so that the projection point falls into the crosshairs of the lines, where the light flux begins to deviate upward and to the right at an angle of 15–20°. Repeat the operation on the second headlight.
- For separate optics, adjustment is made for each of the four lamps. Only the main beam is set on the top line, and the low beam devices are set on the bottom line.
Important point! If the car is equipped with remote control of the headlight angle from the passenger compartment, you need to set the controls to the zero position before making adjustments.
In some modern cars, manufacturers install automatic control elements for lighting devices. The system reacts to the rotation of the steering wheel and wheels, and directs the optics in the appropriate direction, the car seems to “look” around the corner. Car service specialists will help you correctly adjust headlights with automatic drives; it is not recommended to adjust them in garage conditions.
Adjustment of PTF blocks
The task of fog lights is to ensure maximum visibility of the car for oncoming traffic and to illuminate the section of the road in front of the car when the powerful light of standard devices is reflected by a thick veil of fog. Accordingly, the beams should be directed below and parallel to the road surface.
To configure headlights of this type, follow this algorithm:
- Determine the distance from the centers of the PTF blocks to the ground level and draw a corresponding horizontal line on the wall.
- Draw the second line at the same distance above the first. Mark the center axis of the car and both fog lights with vertical lines.
- Place the machine opposite the wall, measuring 10 m. Turn on the PTF and, using the adjusting screws, ensure that the centers of the light spots are at the intersection points of horizontal lines with vertical segments.
- Lower the beams until the distance from the top borders of the beams to the horizontal line is 10 cm.
During the setup process, it is not necessary to cover the fog lights one by one with shields. This measure simplifies adjustment - excess light does not interfere with accurately determining the outline on the wall.
Adjusting headlights yourself
In order to avoid problems such as a reduced visibility range at night, as well as an increase in danger for drivers driving in the oncoming lane, you need to properly adjust your car's headlights.
Universal instructions for adjusting headlights
This can be done manually, with the help of car service specialists or using the necessary equipment. If you want to save money, but carry out this procedure correctly, then self- adjustment of headlights is carried out in four stages :
- make markings on the wall;
- mark the lamps;
- adjust low beam;
- adjust the high beam.
When to adjust headlights
Every driver should know when to adjust their headlights. Therefore, if you are not one of them, then let us briefly remind you about this. This procedure is performed in one of the following cases:
- When replacing lamps in a headlight. This applies to devices with both single and separate optics.
- When replacing one or both headlights. This may be caused by its failure, an accident, or the owner’s desire to install a more powerful or technologically advanced lighting device.
- In case you feel that you have become uncomfortable driving with the existing light and need to make adjustments.
- In the case when, when driving in the dark, drivers of oncoming cars flash their high beams at you, thereby signaling that you are blinding them.
- When installing fog lights. As a rule, only the PTF is adjusted.
- After performing work related to changing the stiffness of the suspension.
- When replacing wheels or tires with similar products with different diameters.
- In preparation for undergoing routine maintenance.
- Before traveling long distances.
Monitor the light emitted by your vehicle's headlights and adjust it if necessary. Remember that an incorrectly set light causes discomfort and a threat not only to you, but also to drivers of oncoming cars.
Two universal ways to adjust headlights
Before you start adjusting the headlights, you should car parameters
- The difference in tire volumes.
- The condition of the springs in the suspension.
- Complete distribution of all possible loads.
- Tire pressure level.
If there are malfunctions here, then the lighting angle will be incorrect, which, in turn, will certainly affect the quality of the adjustment itself. Naturally, in order to adjust the light correctly, you will need to meet some important conditions . The first of these is the presence of a vertical, flat wall with sufficient space for a car - a length of at least 7.5 meters.
For direct marking, you can use either chalk or adhesive tape. Since each car has its own dimensions, the markings for it are purely individual. However, there are several standard values that can be used for almost all cars.
The first way to adjust headlights
We find a flat area, the side of which should rest against the wall. The wall, in turn, must be without protrusions, corners, various irregularities and strictly vertical. We drive close to the wall and mark the center of the car, as well as the central axis of the lamps.
To correctly mark the wall, you need to mark the distance from the floor to the lamp and from the marked lamp to the center of the car. Then you should draw another line on the wall, located 5 cm below the first. Next, we move 7.5 meters away from the wall and draw a horizontal line on the wall that will connect the central points on both lamps.
Then we draw vertical lines through the central points of the headlights. Another vertical line should be drawn through the center point of the machine. This line should be 7.62 cm lower than the one that connects the center of our headlights.
Adjusting screws for adjusting the headlight beam
Having made the markings, turn on the low beam of the headlights and make a direct adjustment, in which the angle of the lamps completely coincides with the horizontal line. And the place where the light begins to rise upward must necessarily coincide with the intersecting drawn lines.
As a result, to get the desired beam of light, you should tighten the adjusting screws , which are located under the hood of the car on the back of the headlight.
The ideal option is when the light is slightly below the center of the headlights.
If your car has a separate high and low beam system, then each beam of light will have to be adjusted in turn. And the wall markings will also be slightly different - the low beam is adjusted according to the method described above. And the high beam must be placed so that it exactly falls on the central markings of the headlights. In this case, it is better to use special equipment, without which ideal adjustment will not be possible in this version.
The second way to adjust the headlights
You will need the same flat wall as in the first case, but the car must be placed at a greater distance - 10 meters. To make the adjustment as accurately as possible, you should first prepare the car : pump up the tires, fill a full tank of gasoline, and put behind the wheel a person who is the closest in weight to the driver.
How to adjust headlights without instruments
On the wall we mark the places that correspond to the center of the lamps, as well as at the distance at which they are located in reality. We connect these two points horizontally, then draw two more horizontal lines:
- 12 cm lower;
- 22 cm higher.
Having completed the marking, we set the lighting width control to zero. The upper limit of the light spot of the main headlights should be the second line, and the third line will be the upper limit of the fog lamps.
But the intersection of all light fluxes should be at the intersection of our lines numbered 2 and 3 - below the center of the lamps by 12 and 22 centimeters, respectively. Also, the driver should definitely make sure that the additional screw is in an intact state , and if there is a hydraulic corrector, it must be adjusted according to the received load - the position of the car with one driver, without passengers.
PTF adjustment
Adjusting the fog lights, although slightly, still differs from the method described above. Before adjusting the PTF, you need to equip the car with an additional load of 70 kilograms - anything will do and fit in your car.
We also fill the tank full and place the car so that it is located on the most flat horizontal surface, 10 meters from the light of the resulting screen. However, many experienced drivers claim that 5 meters is enough.
Fog lamp adjustment diagram
We draw lines on the wall, indicating important points with their edges. The bottom line is the size from the ground to the fog lights, the top line is the same, only twice the distance.
We also mark the distance to the center of the car, looking at it directly to the centers of both fog lights. The result should be a lined screen surface with two points at the center of the lamps, and there will also be restrictions on the lower and upper boundaries of the light.
After drawing the lines, we install the car at a distance of 10 meters from the wall and, using a screwdriver and adjusting screws on the headlights, focus the beam of light from the lamps at those points where the centers of the headlights intersect.
Adjusting lensed headlights
Before adjusting lensed headlights, you need to know that there are two types of them - adjustable and non-adjustable. The latter are quite cheap, and we do not recommend using such lighting devices. One example of such a headlight is produced under the Depo brand. Some headlights are equipped with automatic control. However, it often fails, so this is also not the best option.
To adjust lensed headlights, there are also special regulators, as on conventional lighting fixtures. In this case, it is impossible to give unambiguous recommendations, since in different cars and even in different headlights, adjustment occurs using different means. As a rule, adjusting bolts or handles are used for this. But after reading the general instructions for adjusting headlights, you will be able to cope with the task.
Adjusting the headlights with the device
Adjusting the headlights according to the device
At service stations, headlights are usually adjusted using special devices. Their purchase is not practical for the average car owner, since such a device costs a lot, and it does not have to be used very often. Therefore, knowledge of how to adjust headlights with a device will only be useful to you in order to check whether the service station worker is acting correctly.
The verification algorithm will be as follows:
- Align the longitudinal axis of the device with the vehicle. It’s not a fact that the car drove strictly perpendicular to the pit. This is the basic condition. To perform this, the device has a mirror in its upper part with a horizontal line applied to it. Using it, you can easily align the device so that it stands strictly perpendicular to the body and headlights.
- Place the device strictly horizontally. Typically, the design of its body provides a level with an air bubble for these purposes. This is a simple but reliable tool that allows you to achieve the desired results.
- Setting the adjustment angle. On different devices it can be set using different methods (one of these options is a rotary roller). The angle value “0” means that the headlights will shine strictly straight in the direction of the vehicle. The angle can vary by tenths of a degree. You can find the angle at which you need to set the headlight in the reference literature for your car.
- The axis of the adjusting device and the axis of the headlight must coincide.
Remember not to “raise” the headlight beams too much. Indeed, in this case, the value of the luminous flux can decrease by 20.30%, which is a significant indicator. In addition, this will blind drivers coming towards you.
Adjusting low beam headlights in photos
Animation to attract attention
After replacing the rear body level sensor, the headlight levels were lost. I adjusted it myself and took photos at the same time.
We set all correctors to 0, disable all adaptive adjustments. For better accuracy, you can throw a bag of potatoes into the trunk.
We are looking for a flat area, close to which there is a wall or fence, without curbs or embankments. It will be more convenient to carry out measurements in the future.
So, we park the car at some distance from the wall, about 5 meters for me.
We measure the distance from the wall to the light bulb. I intended 470cm.
Then the height of the beam emerging from the lens. In fact, the height is 72 cm, it didn’t look very good in the photo.
Open the hood and look for a number with percentages on the headlight housing. Puzoterok usually have 1.0%, crossovers 1.2%. This is the angle of incidence of the beam as a percentage per 1 meter. That is, for every meter removed from the headlight, the beam lowers by 1 cm.
We carry out complex mathematical calculations.
The machine is parked 4.7 meters from the wall. The incidence of the beam at this distance should be 4.7m*1%=4.7cm.
This means that on the wall the height of the beam should be 72 cm - 4.7 cm = 68.6 cm
We mark a 68 cm mark on the wall and go to turn the adjusting screws.
We expose and check the right one.
Ready. After such adjustment, the device will show the ideal setting in the service.
Do-it-yourself adjustment of low and high beam headlights
When driving at night, drivers often face the problem of reduced visibility. This leads to increased danger for drivers driving in the oncoming lane. If such a problem occurs, you will have to adjust the low beam of the car headlights. To do this, it is not necessary to go to the specialists of the nearest service center. It is enough to navigate the features of correct headlight adjustment.
When is it necessary to adjust the headlights?
Comprehensive adjustment of car headlights is necessary in such cases.
- Replacing a light bulb in a headlight. This requirement is relevant for a lighting device that has both single and separate optics.
- Replacing a set of headlights, or one of the sides. The reasons are different - failure, getting into a minor traffic accident, installing a device with increased power.
- Discomfort when driving in the evening.
- Drivers moving in oncoming traffic often blink back, making it clear that you are blinding them.
- Installation of fog lights. Usually they are the only ones who need adjustment.
- Carrying out work aimed at changing the level of suspension stiffness.
- Replacing tires or wheels with analogues with an increased diameter.
- Planning a long-distance trip.
Do-it-yourself headlight adjustment
Let's say the driver changed a light bulb in one of the headlights. You can check its operation near the store. You need to get closer to the nearest wall so that there is a distance of 5-6 meters between it and the car. By turning on the low beam, the owner sees whether the headlights are shining synchronously.
Low beam
The sequence of actions is as follows.
- We drive as close to the wall as possible. The road surface must be level so that the car does not stand at an angle.
- We determine the central axis of the machine and draw a line on the wall from bottom to top.
- To adjust the low beam, turn on reverse gear and drive 4-5 meters back. We measure the distance vertically and horizontally.
- We mark the obtained measurements on the vertical plane. Draw a horizontal stripe on the wall five centimeters below the vertical mark. Next, we apply a range from the central part on each side. We draw vertical lines from the obtained points.
- After applying the markings, set the light. Turn on the DRL and adjust the light so that its horizontal direction matches the lines drawn on the vertical surface. Then we check that at the point where the two strips intersect, the beam goes slightly upward at an angle.
Note! Correctly setting the low beam headlights on a car is possible in the evening or at night, when the light beam is easier to see.
To quickly adjust the low beam headlights, the diagram will help.
High beam
To get the factory high beam, you need to use the adjusting screws located on the inside of the plastic housing. To do this you need to open the hood.
The technique is good for car owners where the headlight housing has a combined low and high beam. Using the system described in the previous section, the range will be corrected automatically.
Setting up lensed headlights
Lensed headlights come in two types - adjustable and non-adjustable. Devices that do not support adjustments will cost a minimum, but you should not use them. Some lensed devices have an automatic regulator.
To adjust the beam, regulators located in the rear of the body, in the engine compartment, are used. There are no clear recommendations, because different products must be used for each car. Typically handles or adjusting bolts are used. The packaging contains general setup instructions that are suitable for basic correction.
Adjusting xenon headlights
Among all existing types, xenon headlights hold the lead in light intensity. Therefore, they require fine tuning. The sequence of actions is as follows.
- We choose a flat road and a flat wall.
- We drive the car as close to the wall as possible.
- We draw a straight line along the wall vertically. It should match the center part of the headlight.
- Having found the center, draw 2 vertical lines relative to the center. They should be exactly in the center of the lens.
- Draw a horizontal line through the center, mark 7.62 centimeters and draw another similar line.
- We drive the car back 7.5 m.
- We use clamps to move the headlight.
- Using the regulator, we direct the light beam in the appropriate direction.
- We direct the beam of light so that its level matches the bottom line.
- We adjust the direction of the light flux.
For fine adjustments, it is advisable to go to a service center where there is a computer stand.
Errors during adjustment
Correct adjustment of headlights is possible subject to compliance with technological standards. Drivers who have never previously had to adjust the direction of the light beam make such mistakes.
- The wall is distorted.
- The car is parked on a slope.
- The suspension springs are faulty, causing the car to tilt.
- The vehicle's suspension load is incorrectly distributed.
- Tires have uneven pressure.
Adjusting the direction of the headlights is not a case where it is impossible to make things worse. If you don’t have the desire, skills or suitable site, go to the service center!
On the border of light and darkness: how to properly adjust the headlights yourself
Think about it, when was the last time you adjusted the headlights on your car? I'm sure most of you will say never. Meanwhile, adjusting headlights has no less impact on road safety than working brakes or steering. We'll tell you when headlight adjustment is necessary and how to do it yourself without using complex equipment.
Those who drive a lot in the dark, and in winter these are the majority, have probably noticed that when passing one oncoming car you do not experience any discomfort, but when meeting another you almost have to close your eyes from the blinding light. This usually happens on the highway when drivers forget to switch from high beam to low beam. (Remember that traffic regulations insist that this must be done at least 150 m before the oncoming car or earlier if the driver of the oncoming vehicle asks you to do this by periodically switching the headlights.)
However, in most cases, especially in the city, high beams have nothing to do with it. The cause of white circles before the eyes is incorrectly adjusted low beam. The headlight, instead of illuminating the road, begins to shine upward, thereby blinding oncoming drivers . But how can this happen, you ask, since all cars leave the factory with adjusted headlights? And here we move on to the first point of our article.
Causes of headlight misalignment
In fact, there can be a lot of reasons. The first is a simple replacement of the light bulb. Lamps are known to burn out from time to time and have to be replaced. They are usually replaced with one that is suitable for the type, but from a different manufacturer. We don’t think anyone would think of looking for exactly the same one in a store. The exception is exclusive light bulbs, which are sold in pairs. When one headlight shines white and the other yellow, it’s not very beautiful, we agree. However, even because of this, you are unlikely to drive in the dark with only one headlight, especially if the lamp burns out somewhere on the highway, and you still have to cut and cut for days to get to another city. Of course, buy the first one you come across. This is where the need to adjust the headlight may arise.
The fact is that no matter how standardized the lamps are, depending on the manufacturer, the location of the spiral in them can be shifted, especially if we are talking about inexpensive lamps or even counterfeit ones. In this regard, the entire light beam shifts, and the headlight either begins to shine upward and blind, or hits in front of the bumper. So, if you have changed a headlight bulb, be sure to check the light adjustment. It also happens that, due to the inconvenience of replacement, many people insert the light bulbs incorrectly, that is, skewed, and this also leads to the fact that the headlight begins to shine in the wrong direction.
It's no secret that cars get into accidents. If the front part of the car is damaged, repairs usually require removal of the optics. But no matter how well the repair is carried out, the headlight will no longer fit in the same place where it was installed at the factory and adjusted there. It will definitely stand up, albeit with slight displacements. And the headlight itself will most likely be new. So it will definitely need adjustment.
Headlights are also replaced due to their breakdown. They, after long use, can also fail. The glass becomes cloudy, the reflector becomes dull, and simply because of the temperature, the plastic holding the reflector or lens in the body may dry out, or part of its attachment to the body may even fall off. In this case, the headlight is replaced with a new one, and it also necessarily requires adjustment.
And the headlights can be stolen. There are quite a few entire cars without headlights on our roads. Simply inserting new ones in place of the old ones is not enough; adjustment is necessary.
So there can be many reasons for adjustment. But often owners stop at the fact that the headlight starts to shine. As they say, it burns and that’s okay. But in fact, adjusting the headlights is not so difficult.
How to properly adjust your headlights yourself
So, for example, you changed a light bulb in one of the headlights. You can check whether it shines there directly at the store. It’s enough to drive up to the wall at a distance of about five meters, turn on the low beam (it’s good if it’s twilight or night, but during the day, in principle, it’s possible to see the light beam at that distance) and see if your headlights are shining in sync.
This is easy to do based on the reflection on the wall. The main thing is that the area on which the car is parked is more or less level. If the difference in beam height from the headlight where the bulb was replaced with the one in which the bulb was not changed is not visible, then you are lucky; there is no need to adjust. If the headlight shines a little lower or higher, then first check whether the lamp is in its place. If the lamp is clearly in the seat, but shines in the wrong direction, then proceed with adjustment. To do this, there is a special screw on the headlight, by engaging which you can easily either lower or raise the light beam. By the way, to understand whether your car’s headlights are shining correctly, in principle, just ask a person to stand in front of the car at a distance of five meters. For properly adjusted headlights, the cut-off line will be approximately at knee level.
More precise headlight adjustments can be made using a laser level. To do this, you will need to park the car, but this time on a perfectly flat area, again five meters from the screen, which can be a flat wall of a house or repair bay. Next, we set the building level perpendicular to the movement of the car in such a way that the laser beam passes exactly in the middle of the low beam lamps or lenses, and its projection is displayed on the “screen” where the headlights will shine. Then open the hood and look at the headlight markings. The headlight will necessarily indicate a percentage number that characterizes the deviation of the beam towards the road surface from the horizon, called the initial directivity. Typically this is 1%, although it can be more.
And then it’s a matter of technology. Turn on the low beam and look where the cut-off line of the beam is. If it extends beyond the laser line at the top, this indicates that your headlights are not shining correctly. Moreover, they not only blind oncoming drivers, but also significantly reduce your visibility, because they shine upwards rather than onto the roadway. If the boundary of the beam is significantly lower, then the road is generally illuminated only in front of the car, but not at the distance when the braking distance is less than the line of sight or at least equal to it. And this is again bad. Ideally, the boundary of the light beam will be 5 centimeters below the laser level, which, at a distance to the screen of five meters, is the same “1%” slope. In this case, the headlights will be correctly adjusted. If this is not the case, then rotating the adjusting screws will allow you to easily bring them back to normal.
For more accurate and professional headlight adjustment, you can contact the service. However, as practice shows, after the adjustment method described above, the adjustment on professional equipment will require little, if any, adjustment. In addition, not every specialist knows how to work correctly on such equipment. If, for example, you did not check the tire pressure before adjusting the headlights , this may already indicate the “qualification” of the master.
According to the rules, before adjusting the headlights using special equipment, the tire pressure must be checked and equalized, the fuel tank and other filling containers must be completely filled, the driver or a person similar in build must be sitting behind the wheel, the suspension must be pressed, and the manual interior headlight leveler must be set to position "0". Only in this case can a 100% result be guaranteed. By the way, the last point is one of the prerequisites for any adjustment.
So don't be lazy to check where your car's headlights are shining. And then, being on the border of light and darkness, you yourself will never get lost, and you will not lead the person you meet astray from the true path.
Add a comment Cancel reply
You must be logged in to post a comment.